This is the most actionable, practical and easiest guide to setting up an AirTag. Once you get the hang of it, you can start using the Apple AirTag on iPhone or Mac.

How to set up an Apple AirTag and start using it
It’s super important to know how to connect the Apple AirTag the proper way. Once you know how to activate Apple AirTag, you will be able to keep track of the keys, the dog, the luggage, and the glasses perched on your head.
First, set up the AirTag
You will need an iPhone/iPod touch running iOS 14.5 or later. Alternatively, you can use an iPad running iPadOS 14.5 or later. You can’t set up an AirTag using a Mac, unfortunately.
- Remove the plastic wrap on your AirTag to activate the battery. This should make it beep
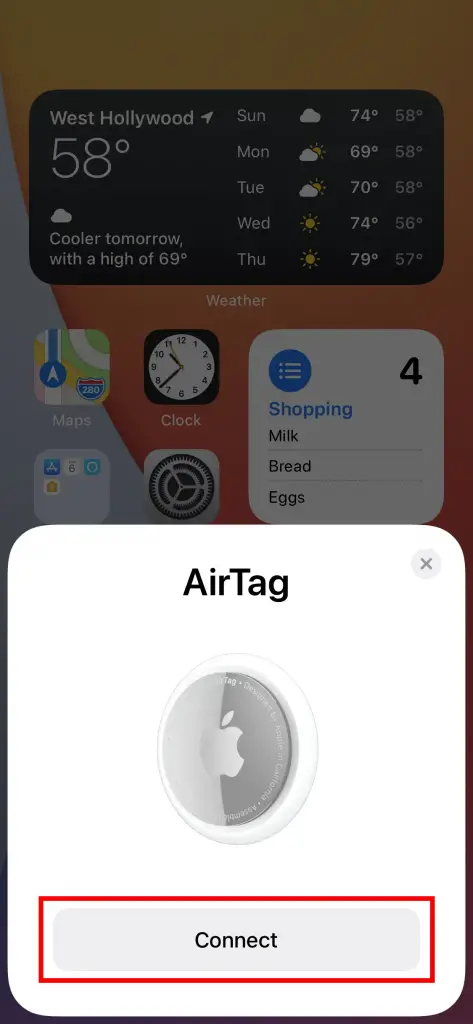
- Hold the AirTag near your iPhone and tap Connect. If your iPhone doesn’t detect your AirTag immediately, lock your screen by pressing the power button on the side of your iPhone once. Then unlock your iPhone and hold it near your AirTag again
- A pop-up alert will appear with a Connect button. Click it

- You will be asked to name your AirTag. You may choose to create a custom name
- You may also choose a custom icon or emoji
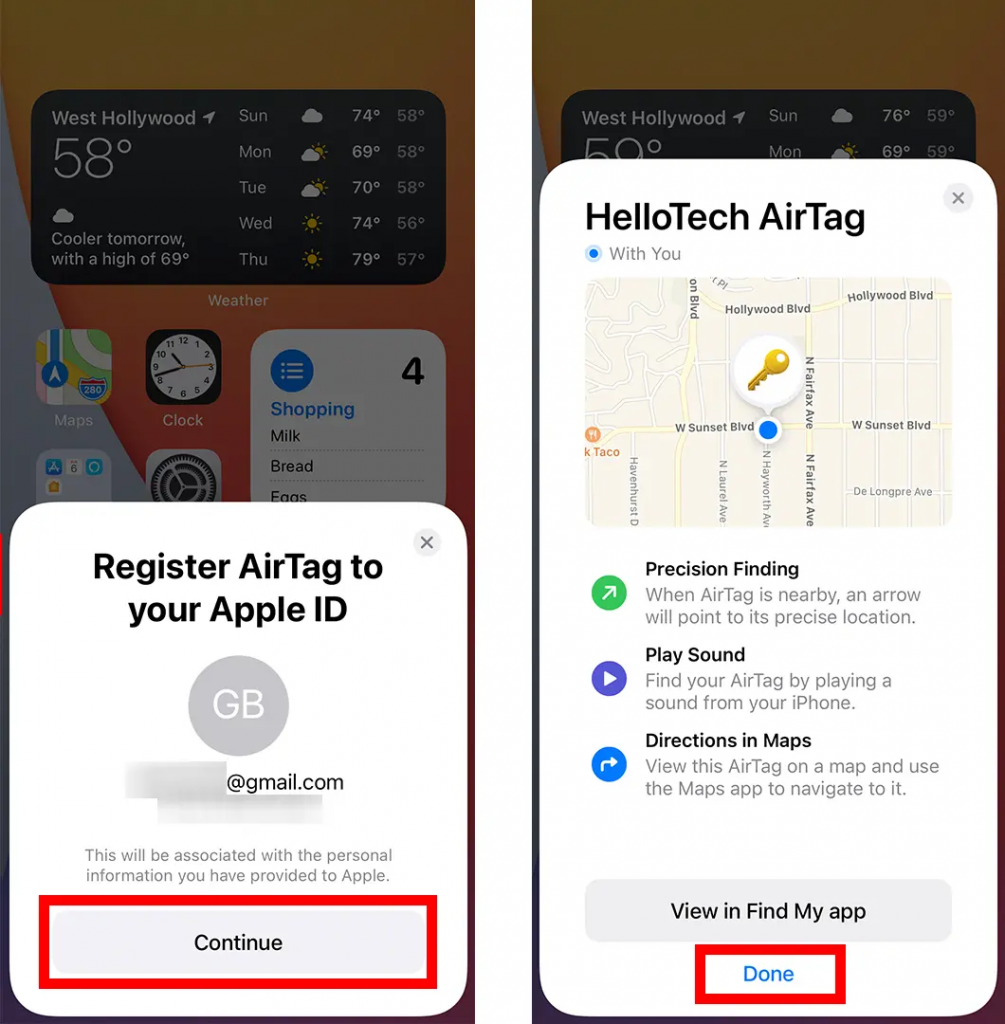
- Tap Continue to register your AirTag with your Apple ID
- Finally, tap Done

- Once you set up your AirTag, you can use the Find My app to locate it in several ways


